Table of Contents
Rich Mini Cheesecakes with Fudgy Brownie Base – The Perfect Two-Bite Dessert

I still remember the first time I made these rich mini cheesecakes with fudgy brownie base. It was a rainy Saturday in my tiny Paris apartment, and I was craving something that reminded me of my mother’s kitchen in Morocco — where chocolate and cream always found a way onto the same plate. I pulled out a well-worn brownie recipe I’d learned at Le Cordon Bleu, and folded it into the cheesecake technique I’d been perfecting. The result was pure magic: a dense, fudgy brownie layer topped with velvety cheesecake, all in a perfectly portioned mini size. These mini cheesecakes with brownie base have been a staple in my NYC kitchen ever since.
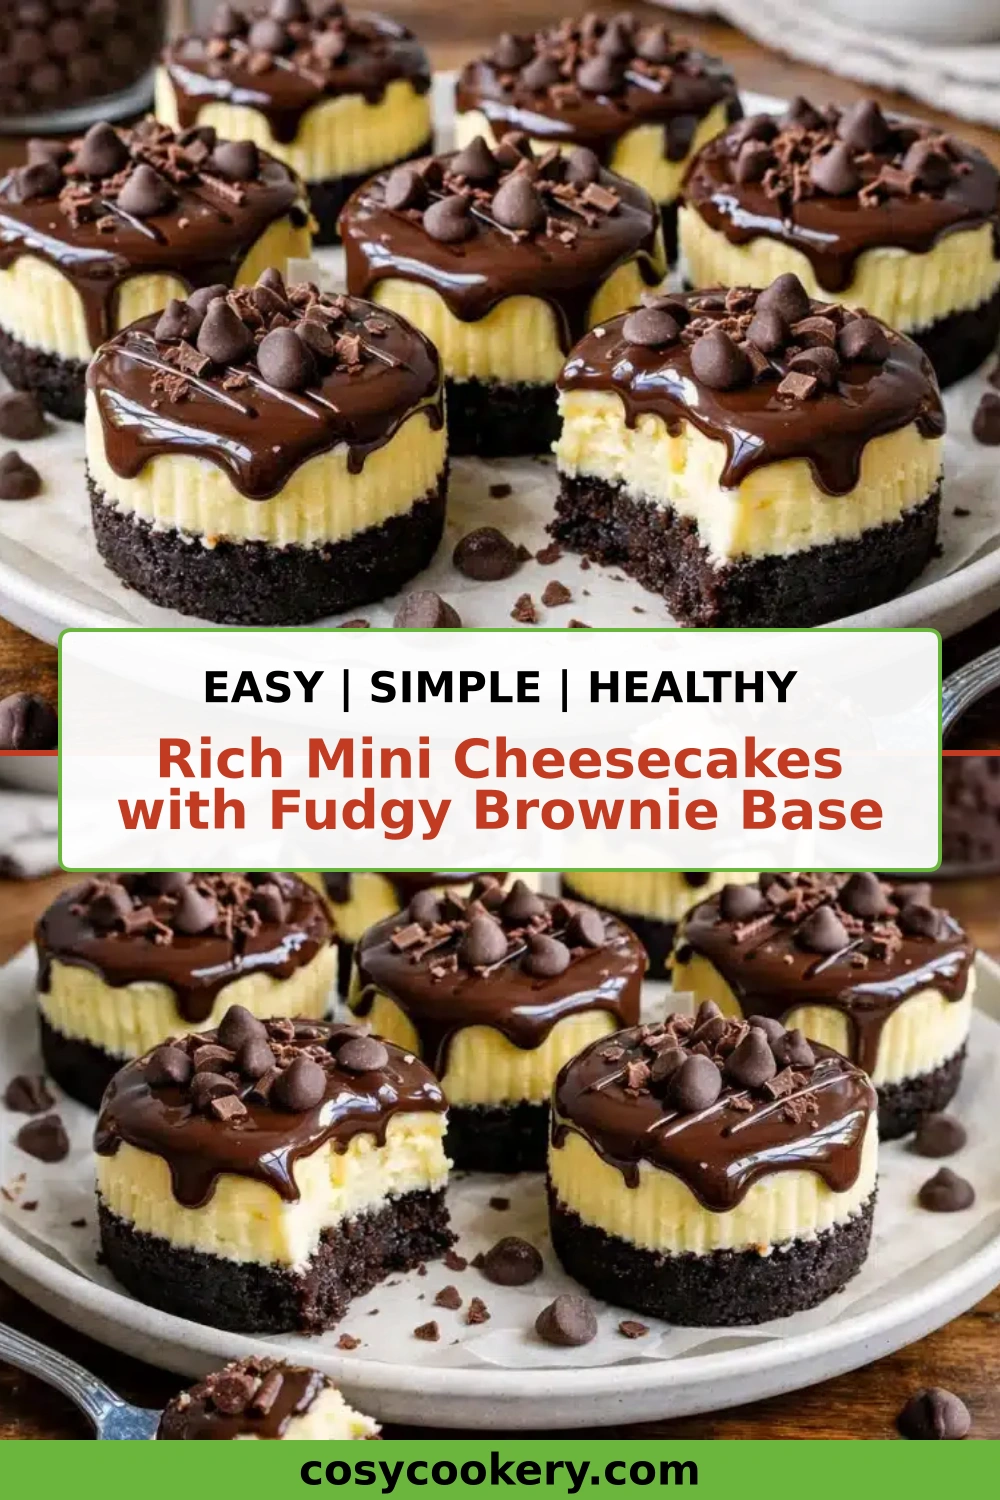
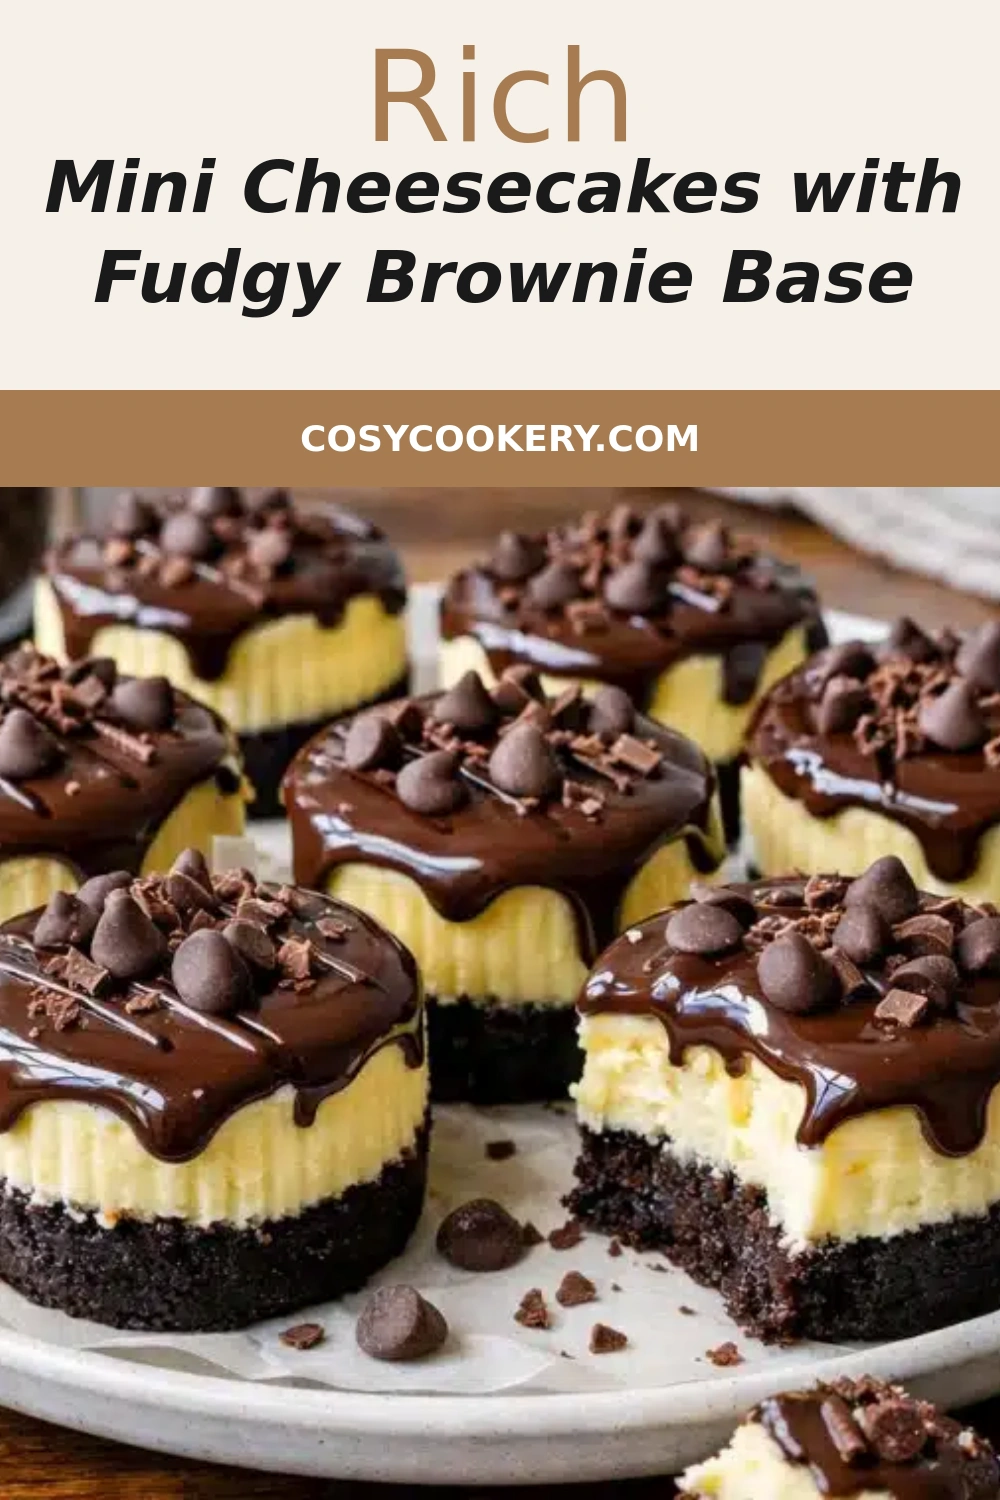
When you bite into one of these little treasures, the contrast hits you immediately. The brownie base is deeply chocolatey — almost truffle-like in its richness — with that signature crackly top that gives way to a soft, fudgy center. The cheesecake layer above is silky, tangy, and luxuriously creamy, with a whisper of vanilla that ties everything together. I add a pinch of flaky sea salt on top, a trick I picked up from a pastry chef in Paris, and it elevates every bite. These rich mini cheesecakes with fudgy brownie base are the kind of dessert that disappears at parties, and no one believes they came from a home kitchen.
What makes my version different from other brownie-bottom cheesecakes? I use a melted-chocolate brownie base instead of a box mix — it gives a deeper, more complex flavor and that genuine fudgy texture. I also bake the brownie layer briefly before adding the cheesecake, so the two layers stay distinct. The cheesecake itself uses room-temperature ingredients (a non-negotiable from my French training) and a hot water bath technique that prevents cracks. 💡 Olga’s Pro Tip: Don’t skip the water bath — it’s the secret to a silky-smooth top every time. One common mistake? Overmixing the cheesecake batter, which incorporates too much air and causes cracks. I’ll show you exactly how to avoid that.
Why This Mini Cheesecakes with Brownie Base Recipe Is the Best
The Flavor Secret — I use high-quality dark chocolate (70% cacao) for the brownie base, which gives an intense, sophisticated chocolate flavor that pairs beautifully with the tangy cream cheese. A touch of espresso powder deepens the chocolate without making it taste like coffee. This is a trick I learned from a chocolatier in Paris, and it makes these mini cheesecakes with brownie base taste like they came from a fancy patisserie.
Perfected Texture — The brownie base is baked just until set before the cheesecake is added, creating a distinct layer that stays fudgy and dense. The cheesecake is baked low and slow with a water bath, resulting in a silky, creamy texture that’s completely smooth — no cracks, no graininess. This dual-texture experience is what makes these rich mini cheesecakes with fudgy brownie base so satisfying.
Foolproof & Fast — Despite the elegant result, this recipe is surprisingly approachable. The brownie base comes together in one bowl, and the cheesecake filling is equally simple. I’ve streamlined the steps so home cooks can achieve a professional result without any special equipment. Whether you’re a seasoned baker or trying cheesecake for the first time, these mini cheesecakes with brownie base will make you look like a pro.
Mini Cheesecakes with Brownie Base Ingredients
I source my ingredients from the Union Square Greenmarket in NYC — the cream cheese from a local dairy farm tastes noticeably fresher, and the eggs from pasture-raised hens give a richer color and flavor. In my mother’s kitchen in Morocco, we used preserved lemons and saffron, but here in America, I’ve learned to work with what’s available and make it sing. These ingredients are all easy to find at any well-stocked grocery store.
Ingredients List
For the Fudgy Brownie Base:
- 1/2 cup (1 stick / 113 g) unsalted butter
- 4 oz (113 g) dark chocolate (70% cacao), chopped
- 3/4 cup (150 g) granulated sugar
- 2 large eggs, room temperature
- 1 tsp vanilla extract
- 1/2 cup (60 g) all-purpose flour
- 2 tbsp (10 g) unsweetened cocoa powder
- 1/4 tsp salt
- 1/2 tsp espresso powder (optional, but recommended)
For the Cheesecake Topping:
- 16 oz (452 g) cream cheese, room temperature
- 1/2 cup (100 g) granulated sugar
- 2 large eggs, room temperature
- 1/3 cup (80 ml) sour cream, room temperature
- 1 tsp vanilla extract
- 1 tbsp all-purpose flour (helps prevent cracks)
- Flaky sea salt, for garnish
Ingredient Spotlight
Cream Cheese — Full-fat block cream cheese is essential for a rich, creamy cheesecake. Avoid whipped or reduced-fat versions, as they contain more water and can make the filling runny. I prefer Philadelphia brand for consistent results. Let it come to room temperature naturally for at least 2 hours before using — this prevents lumps and ensures a silky smooth texture.
Dark Chocolate — Use a high-quality chocolate bar (not chocolate chips, which often contain stabilizers that affect melting). I recommend 70% cacao for the perfect balance of sweetness and intensity. A good option is Ghirardelli or Lindt. The chocolate is the star of the brownie base, so don’t skimp here.
Sour Cream — Full-fat sour cream adds tanginess and moisture to the cheesecake, creating that signature velvety texture. Greek yogurt (plain, full-fat) is a fine substitute in a pinch, but sour cream gives a slightly richer result.
| Original Ingredient | Best Substitution | Flavor / Texture Impact |
|---|---|---|
| Cream Cheese | Full-fat Greek yogurt (strained) | Slightly tangier, less rich, softer set |
| Dark Chocolate (70%) | Semi-sweet chocolate (60%) | Sweeter, less intense chocolate flavor |
| All-Purpose Flour (brownie) | Gluten-free 1:1 blend | Slightly more tender, works well |
| Sour Cream | Plain full-fat Greek yogurt | Very similar texture, slightly tangier |
How to Make Rich Mini Cheesecakes with Fudgy Brownie Base — Step-by-Step
This recipe is straightforward and rewarding. Follow these steps carefully, and you’ll have a batch of perfect mini cheesecakes with brownie base that rival any bakery.
Step 1: Prepare the Brownie Base
Preheat your oven to 350°F (177°C). Line a 12-cup muffin tin with paper liners. In a medium saucepan over low heat, melt the butter and chopped dark chocolate together, stirring frequently until smooth. Remove from heat and whisk in the sugar. Let cool for 2 minutes, then whisk in the eggs one at a time, followed by the vanilla extract. In a small bowl, whisk together the flour, cocoa powder, salt, and espresso powder. Fold the dry ingredients into the chocolate mixture just until combined — do not overmix. Divide the brownie batter evenly among the 12 muffin cups, using about 1.5 tablespoons per cup. Bake for 8 minutes — the brownie layer should be just set but still fudgy in the center. Remove from oven and reduce the temperature to 325°F (163°C). Let the brownie bases cool in the pan for 10 minutes while you prepare the cheesecake filling.
⚠️ Common Mistake to Avoid: Overbaking the brownie base. It should still be slightly soft and fudgy when it comes out — it will continue to cook when the cheesecake bakes on top. If you bake it until a toothpick comes out clean, the base will be dry.
Step 2: Make the Cheesecake Filling
In a large mixing bowl (or the bowl of a stand mixer fitted with the paddle attachment), beat the room-temperature cream cheese on medium speed until smooth and creamy — about 2 minutes, scraping down the sides as needed. Add the sugar and beat for another minute until well combined. Add the eggs one at a time, beating on low speed after each addition, just until incorporated. Add the sour cream, vanilla extract, and flour, and mix on low speed until just combined — stop as soon as no streaks remain. The batter should be smooth and silky. Do not overmix at this stage, as it will incorporate too much air and lead to cracks during baking.
💡 Olga’s Pro Tip: All ingredients must be at room temperature — this is the single most important factor for a crack-free cheesecake. Cold cream cheese creates lumps, and cold eggs can cause the batter to separate. Take everything out of the refrigerator 2 hours before you start.
Step 3: Assemble and Bake
Divide the cheesecake filling evenly over the pre-baked brownie bases, filling each cup almost to the top (about 2 tablespoons each). Tap the muffin tin gently on the counter to release any air bubbles. Prepare a water bath: place the muffin tin inside a larger baking dish (like a 9×13-inch pan) and pour hot water into the outer dish until it reaches about halfway up the sides of the muffin cups. This gentle, humid environment is what gives the cheesecake its silky texture. Bake at 325°F (163°C) for 22–25 minutes, until the edges are set and the centers still jiggle slightly when you gently shake the pan. The cheesecake will continue to set as it cools.
⚠️ Common Mistake to Avoid: Skipping the water bath. Baking cheesecake in a dry oven causes the top to dry out and crack. The water bath creates steam and maintains even heat, which is essential for a smooth, creamy finish.
Step 4: Cool and Chill
Carefully remove the muffin tin from the water bath and place it on a wire rack. Let the mini cheesecakes cool completely in the pan at room temperature — about 1 hour. Then, refrigerate them (still in the pan) for at least 4 hours, but overnight is best. Chilling firms up the texture and allows the flavors to meld. Once fully chilled, remove them from the pan and peel off the liners. Sprinkle with flaky sea salt just before serving for a beautiful finish.
💡 Olga’s Pro Tip: For clean, perfect slices, use a warm, dry knife to cut through the brownie base if you’re serving them on a platter. Wipe the knife between cuts. But honestly — these mini cheesecakes with brownie base are meant to be eaten in two bites, so just grab one and enjoy!
| Step | Action | Duration | Key Visual Cue |
|---|---|---|---|
| 1 | Prepare brownie base and par-bake | 8 min | Brownie is set at edges, soft in center |
| 2 | Make cheesecake filling | 5 min | Smooth, no lumps, silky texture |
| 3 | Assemble and bake with water bath | 22–25 min | Edges set, center jiggles slightly |
| 4 | Cool and chill | 4+ hours | Firm, creamy, fully set when cold |
Serving & Presentation
These rich mini cheesecakes with fudgy brownie base are stunning served on a simple white platter or a wooden board. I love to arrange them in a circle and garnish with fresh raspberries, a dusting of powdered sugar, and a tiny sprig of mint. The bright red berries contrast beautifully with the dark chocolate and pale cheesecake. For a Moroccan-inspired touch, I sometimes add a sprinkle of cinnamon and a drizzle of honey — it’s a nod to the flavors I grew up with.
In NYC, I often serve these at dinner parties alongside a double espresso or a glass of cold milk for a classic pairing. They’re also perfect for celebrations like birthdays, bridal showers, or holiday cookie exchanges — their mini size makes them incredibly versatile. If you’re feeling extra indulgent, drizzle warm chocolate sauce or caramel over the top just before serving.
| Pairing Type | Suggestions | Why It Works |
|---|---|---|
| Side Dish | Fresh berries, sliced strawberries | Bright acidity cuts through the richness |
| Sauce / Dip | Chocolate ganache, caramel sauce, raspberry coulis | Enhances chocolate flavor or adds fruity contrast |
| Beverage | Espresso, cold brew, milk, dessert wine | Coffee amplifies chocolate; milk balances sweetness |
| Garnish | Flaky sea salt, powdered sugar, mint, edible flowers | Adds visual appeal and a pop of flavor |
Make-Ahead, Storage & Reheating
These mini cheesecakes with brownie base are ideal for make-ahead entertaining. In my busy NYC life, I often prepare them a day or two before a party — they actually taste better after a full day in the fridge, as the flavors have time to meld and the texture becomes perfectly creamy. Here’s everything you need to know about storing and reheating them.
| Method | Container | Duration | Reheating Tip |
|---|---|---|---|
| Refrigerator | Airtight container in single layer | Up to 5 days | Serve cold or let sit at room temp 15 min |
| Freezer | Freezer-safe container, parchment between layers | Up to 3 months | Thaw overnight in fridge — do not microwave |
| Make-Ahead | Assemble, refrigerate unbaked up to 24 hrs | Bake day of serving | Add 2–3 minutes to bake time if cold |
To serve after freezing, transfer the mini cheesecakes to the refrigerator and let them thaw overnight. For the best texture, never microwave cheesecake — it will become rubbery. If you want to serve them slightly warm, let them sit at room temperature for about 20 minutes. The brownie base will soften just a bit, and the cheesecake will be perfectly creamy.
Variations & Easy Swaps
One of the things I love about these rich mini cheesecakes with fudgy brownie base is how adaptable they are. Whether you’re catering to dietary needs or just want to try something new, these variations are all tested and delicious.
| Variation | Key Change | Best For | Difficulty Impact |
|---|---|---|---|
| Chocolate Orange | Add 1 tsp orange zest to cheesecake batter | Holiday gatherings, bright flavor | Easy |
| Gluten-Free | Use gluten-free 1:1 flour in brownie base | Celiac or gluten sensitivity | Easy |
| White Chocolate Raspberry | Swirl raspberry jam into cheesecake; use white chocolate in base | Summer parties, elegant dessert | Medium |
Chocolate Orange Version
This is one of my favorite twists — the bright citrus flavor is a classic pairing with dark chocolate and reminds me of the orange blossom water my mother used in Morocco. Simply add 1 teaspoon of finely grated orange zest to the cheesecake filling along with the vanilla. For an extra layer, you can also add a drop of orange essential oil (food-grade) to the brownie batter. The result is bright, aromatic, and utterly sophisticated.
Gluten-Free Version
To make these mini cheesecakes with brownie base gluten-free, simply swap the all-purpose flour in both the brownie base and the cheesecake filling for a high-quality gluten-free 1:1 baking blend (I recommend King Arthur or Bob’s Red Mill). The texture remains remarkably close to the original — slightly more tender, but just as fudgy and delicious. The cheesecake layer is naturally gluten-free, so only the brownie needs adjustment. This substitution works perfectly for anyone with celiac or gluten sensitivity.
White Chocolate Raspberry Version
For a stunning color contrast and a sweeter flavor profile, try this variation. Replace the dark chocolate in the brownie base with white chocolate (use the same amount, 4 oz). Swirl 2 tablespoons of seedless raspberry jam into the cheesecake filling just before baking — use a toothpick to create gentle swirls. The tangy raspberry against the sweet white chocolate and creamy cheesecake is absolutely divine. I love making this version in the summer when raspberries are at their peak at the NYC farmers market.
Can I use a boxed brownie mix for the base of these mini cheesecakes with brownie base?
Yes, you can use a boxed brownie mix in a pinch, but the texture and flavor won’t be as rich or complex. If you do use a mix, prepare it according to the package directions, then par-bake as directed in the recipe. The main difference is that homemade brownie base has a deeper chocolate flavor and a fudgier, more authentic texture. I strongly recommend making it from scratch — it takes only 10 minutes and makes a noticeable difference in these rich mini cheesecakes with fudgy brownie base.
How do I prevent the cheesecake from cracking on top?
The most important step is using a water bath — it creates a humid environment that prevents the top from drying out and cracking. Additionally, make sure all your ingredients are at room temperature, and avoid overmixing the batter once the eggs are added. Overmixing incorporates air, which expands during baking and causes cracks. Finally, let the cheesecakes cool slowly at room temperature before refrigerating. These techniques together will give you perfectly smooth tops on your mini cheesecakes with brownie base every time.
Can I make these mini cheesecakes with brownie base in a regular muffin tin without liners?
I strongly recommend using paper liners for easy removal and cleanup. The brownie base can stick to the pan, and the cheesecake layer is delicate. If you don’t have liners, generously grease the muffin cups with butter or non-stick spray and dust with cocoa powder. Even with greasing, you may have some sticking. Silicone muffin molds work well too — just place them on a baking sheet for stability. For the best results and easiest cleanup, stick with paper liners for these rich mini cheesecakes with fudgy brownie base.
How long do these mini cheesecakes need to chill before serving?
These mini cheesecakes with brownie base need at least 4 hours in the refrigerator to fully set, but overnight is best. The chilling process firms up the cheesecake layer, allowing it to achieve that perfect creamy, sliceable texture. It also allows the flavors to meld together — the brownie base becomes even more fudgy, and the cheesecake becomes silkier. If you’re in a hurry, you can serve them after 3 hours, but they will be softer and more prone to breaking. Patience is rewarded here!
Can I freeze these rich mini cheesecakes with fudgy brownie base?
Absolutely! These mini cheesecakes freeze beautifully for up to 3 months. Let them cool and chill completely in the refrigerator first, then wrap each one individually in plastic wrap and place them in a freezer-safe container with parchment paper between layers. To thaw, transfer them to the refrigerator overnight — never microwave frozen cheesecake, as it will become rubbery and the texture will be compromised. They taste just as delicious after freezing, making them perfect for make-ahead desserts.
What’s the best way to tell when the cheesecake is done baking?
The best doneness test for these mini cheesecakes with brownie base is the jiggle test. The edges should look set and firm, while the centers should still wobble slightly when you gently shake the muffin tin. This jiggle indicates that the center is still soft and will finish setting as it cools. If the entire top is firm and doesn’t jiggle, the cheesecake is overbaked and may be dry. Remember, cheesecake continues to cook from residual heat after it comes out of the oven, so it’s better to underbake slightly than overbake.
Can I use low-fat cream cheese for these mini cheesecakes?
I don’t recommend using low-fat or reduced-fat cream cheese for these rich mini cheesecakes with fudgy brownie base. Full-fat cream cheese is essential for achieving the proper texture — low-fat versions contain more water and stabilizers, which can make the cheesecake layer runny, grainy, or prone to cracking. The richness of full-fat cream cheese also provides the necessary structure and that luxurious, velvety mouthfeel. For a lighter option, you can reduce the sugar slightly or serve smaller portions, but don’t compromise on the cream cheese.
How do I get the brownie base to stay fudgy and not cakey?
The key to a fudgy brownie base is threefold: use melted chocolate and butter (not cocoa powder alone), don’t overmix the batter once the flour is added, and par-bake for only 8 minutes. Overmixing develops gluten, which makes the brownie cakey. The melted chocolate provides that dense, fudgy texture. Also, make sure you’re measuring your flour correctly — spoon it into the measuring cup and level it off, rather than scooping directly, which compacts the flour and leads to a dry brownie. These techniques ensure your mini cheesecakes with brownie base have that perfectly fudgy foundation.
Can I add toppings or mix-ins to these rich mini cheesecakes with fudgy brownie base?
Absolutely! These mini cheesecakes are highly customizable. For the brownie base, you can fold in 1/2 cup of chocolate chips, chopped nuts (walnuts or pecans work beautifully), or even a swirl of caramel or peanut butter. For the cheesecake layer, try adding a swirl of fruit jam (raspberry, strawberry, or apricot), mini chocolate chips, or a teaspoon of instant espresso powder dissolved in the vanilla extract. Top with fresh berries, a dusting of cocoa powder, or a drizzle of chocolate ganache after baking. The possibilities are endless — get creative and make them your own!
Why did my brownie base turn out too hard or too soft?
If your brownie base turned out too hard, it may have been overbaked during the par-bake step — remember, it only needs 8 minutes at 350°F, and it should still be soft in the center. If it’s too soft or runny, the butter and chocolate may not have been properly emulsified, or the eggs were added while the mixture was too hot, causing them to scramble slightly. Another common cause is inaccurate measuring of flour. For consistently perfect results, use a kitchen scale if possible, and always check your oven temperature with an oven thermometer. These tips will help you achieve the ideal fudgy texture for your mini cheesecakes with brownie base.
Share Your Version!
I absolutely love hearing from you — every comment, star rating, and photo makes my day. If you make these rich mini cheesecakes with fudgy brownie base, I want to know how they turned out! Did you try one of the variations? Did you add your own twist? Your feedback helps other readers know exactly what to expect, and it helps me continue to create recipes that work beautifully in home kitchens.
Snap a photo of your mini cheesecakes with brownie base and tag me on Instagram or Pinterest @cosycookery — I love seeing your creations and sharing them with the community. And if you have a question about any part of the recipe, drop it in the comments below. I personally read and answer every single one. From my NYC kitchen to yours — I hope this recipe brings as much warmth to your table as it does to mine. — Olga 🧡
⭐️ Loved this recipe? Give it a 5-star rating below!
Your feedback helps other home bakers find and enjoy these rich mini cheesecakes with fudgy brownie base. Leave a comment and let me know how yours turned out — I read every single one! 🧡
Love This Recipe? Save It to Pinterest!
If you enjoyed this Rich Mini Cheesecakes with Fudgy Brownie Base recipe, don’t let it get lost in your browser tabs! 😄 Pin it now so you can find it again anytime — and explore hundreds more tried-and-tested recipes waiting for you on my Pinterest boards.
👉 Follow Olga on Pinterest @cosycookery
📌 Pin this recipe · 🔁 Re-pin your favorites · 💬 Tag me when you make it — I love seeing your creations!
RICH MINI CHEESECAKES WITH FUDGY BROWNIE BASE
- Total Time: 4 hours 50 minutes
- Yield: 12 mini cheesecakes
Description
Rich Mini Cheesecakes with Fudgy Brownie Base are the ultimate dessert for anyone who loves the irresistible combination of chocolate and creamy cheesecake. These delightful handheld treats bring together two beloved classics in one indulgent bite. A dense, fudgy brownie forms the rich foundation, while a silky cheesecake layer bakes to perfection on top, creating a dessert that’s elegant enough for celebrations yet simple enough to enjoy on an ordinary
Ingredients
- Great for parties, holidays, and special occasions.
- Freezer-friendly for make-ahead desserts.
- Beautiful presentation with endless topping options.
Instructions
- STEP 1: PREPARE THE MUFFIN PAN Preheat the oven to 325°F (163°C). Line a standard 12-cup muffin pan with paper liners.
- STEP 2: MAKE THE BROWNIE BATTER Whisk together the melted butter and sugar until smooth. Add the eggs and vanilla extract, mixing well. Stir in the cocoa powder, flour, salt, and baking powder until just combined. Divide the batter evenly among the muffin liners, filling each about one-third
full. Bake for 10 minutes, then remove from the oven while preparing the cheesecake
filling. - STEP 3: PREPARE THE CHEESECAKE FILLING Beat the softened cream cheese until completely smooth. Add the sugar and continue mixing until creamy. Mix in the eggs one at a time, followed by the vanilla extract and sour cream. Beat just until the filling is smooth and silky.
- STEP 4: ASSEMBLE THE MINI CHEESECAKES Spoon the cheesecake filling evenly over each partially baked brownie base. Gently smooth the tops with the back of a spoon. Bake for 18 to 22 minutes, or until the centers are just set with a slight
jiggle. The creamy cheesecake layer will become beautifully smooth while the brownie
base stays rich and fudgy underneath. - STEP 5: COOL AND CHILL Allow the cheesecakes to cool completely at room temperature. Transfer them to the refrigerator for at least 4 hours, or overnight for the
best texture. Before serving, decorate with your favorite toppings.
Notes
Full-fat cream cheese provides the creamiest texture.
The cheesecakes continue setting as they cool.
Store chilled until ready to serve.
Top with fruit just before serving for the freshest presentation.
½ cup unsalted butter, melted
1 cup granulated sugar
2 large eggs
1 teaspoon vanilla extract
⅓ cup unsweetened cocoa powder
½ cup all-purpose flour
¼ teaspoon salt
¼ teaspoon baking powder
16 ounces cream cheese, softened
½ cup granulated sugar
2 large eggs
1 teaspoon vanilla extract
¼ cup sour cream
Chocolate shavings
Fresh raspberries
Fresh strawberries
Whipped cream
Chocolate drizzle
Crushed chocolate cookies
Use room-temperature cream cheese for a smooth filling.
Do not overmix the cheesecake batter to help prevent cracks.
Chill thoroughly before removing the paper liners.
Use an ice cream scoop for evenly portioned cheesecake filling.
Add mini chocolate chips to the brownie batter for extra richness.
Fresh berries add a bright contrast to the rich chocolate flavor.
- Prep Time: 20 minutes
- Cook Time: 30 minutes
Nutrition
- Calories: 355
- Sugar: 22g
- Fat: 24g
- Carbohydrates: 29g
- Protein: 6g